
Roofing can be a straightforward task when you know how to stack shingles properly. By organizing your materials effectively, you ensure a smooth installation process while minimizing the risk of damage.
In this guide, you’ll learn the best practices for how to stack shingles on a roof, including techniques for proper weight distribution and preventing slippage. With the right approach, you can enhance both efficiency and safety while working on your roofing project.
Understanding Shingle Types
The variety of shingles available can significantly impact your roofing project. Here’s a summary of the most common types:
| Shingle Type | Characteristics |
|---|---|
| Asphalt Shingles | Affordable, widely used, and easy to install. |
| Wood Shingles | Natural appearance, durable, but prone to fire and rot. |
| Metal Shingles | Long-lasting and energy-efficient, but more expensive. |
| Slate Shingles | Highly durable and aesthetically pleasing, but heavy and costly. |
| Tile Shingles | Weather-resistant and visually appealing, yet heavy and pricey. |
Thou should consider your specific needs, budget, and location when choosing the appropriate shingle type.
Asphalt Shingles
Behind asphalt shingles lies a well-known option praised for its balance of durability and cost-effectiveness. You’ll find them in various colors and styles, making them a versatile choice for any roof. Additionally, they are easy to install, which can save you on labor costs. Many asphalt shingles come with warranties, further adding to their appeal.
Wood Shingles
Shingles made from natural wood provide a classic and timeless look for your roof. You may prefer them for their aesthetic appeal, as they blend seamlessly with many architectural styles, adding character to your home.
However, wood shingles require regular maintenance to avoid issues like rot and pest infestation, which can compromise their lifespan.
Asphalt shingles are often favored for their cost and ease of installation. In contrast, wood shingles, while charming, require diligent upkeep. You should weigh your options carefully, guided by your preferences and your roof’s requirements, to achieve a lasting and beautiful roofing solution.
Preparing the Roof Surface
You need to ensure your roof surface is ready before stacking shingles. This includes thorough cleaning and an inspection for any underlying issues that could affect the longevity of your new roofing materials.
A well-prepared roof surface not only facilitates proper shingle installation but also minimizes the risk of future problems.
Cleaning the Roof
At the start of your preparation, remove any debris, dirt, and old roofing materials from your roof surface. Use a broom or blower to clear away leaves, twigs, and dust that may hinder adhesion. Additionally, check for and clean off any moss or algae to create a pristine foundation for your new shingles.
Inspecting for Damage
Inspecting your roof for damage is vital to ensure you address any potential issues before stacking your new shingles. Look for cracked, missing, or curled shingles and check the underlying sheathing for rot or moisture damage. Identifying and fixing these problems can prevent leaks and extend the lifespan of your new roofing system.
Also, be vigilant for any signs of pests or water damage, as both can lead to further decay over time. Pay attention to flashing around chimneys, vents, and edges; any gaps or wear here can allow water infiltration. Performing thorough inspections can save you time and money by ensuring a solid base for your new shingles.
Tools and Materials Needed
Some vital tools and materials are necessary for effectively stacking shingles on a roof. You will need a sturdy ladder, roofing nails, a hammer or nail gun, a utility knife, and of course, the shingles themselves.
Additionally, a chalk line, measuring tape, and a pry bar can be useful for ensuring proper alignment and installation. Having everything ready before you start will streamline the process and help you avoid unnecessary trips back and forth.
Essential Tools
With the right tools in your arsenal, you can efficiently stack shingles on your roof. Ensure you have a reliable ladder to reach the roof safely, a hammer or nail gun for fastening, and a utility knife for cutting shingles when needed.
A chalk line and measuring tape will help you maintain straight lines, while a pry bar can assist in adjustments as you work. Preparing these tools ahead of time will keep you organized and focused on the task at hand.
Safety Gear
The proper safety gear is vital during roof work to protect yourself from potential injuries. Make sure you wear a hard hat to shield your head from falling objects and sturdy boots for good traction on the roof. Safety glasses can protect your eyes from debris, while gloves will give you a better grip and protect your hands from sharp edges. Investing in quality safety gear will enhance your overall safety as you stack shingles on your roof.
A good safety plan includes more than just gear. Make sure to have a harness and tie-off system if your roof is particularly steep or high. Inspect your safety equipment regularly for wear and tear, and always work with a partner if possible.
This collaboration can help provide assistance in case of an accident and promote a safer working environment for both of you. Taking these precautions will ensure that your roofing project proceeds without mishaps.
Stacking Shingles Properly
Now that you’ve gathered your materials, it’s time to focus on stacking shingles properly. This step is vital for ensuring that your roof remains stable and visually appealing. Stack your shingles in neat rows and align them carefully to prevent shifting during installation. Proper stacking not only facilitates organization but also helps in maintaining the integrity of the shingles by minimizing movement that can lead to damage.
Starting Point
Between the roof’s edge and the first course of shingles, you will want to establish a solid starting point. Make sure this line is level to prevent the shingles from ending up crooked, which could compromise both appearance and performance. Use a chalk line to mark a straight reference point across the roof, ensuring that every subsequent row of shingles can be uniformly aligned.
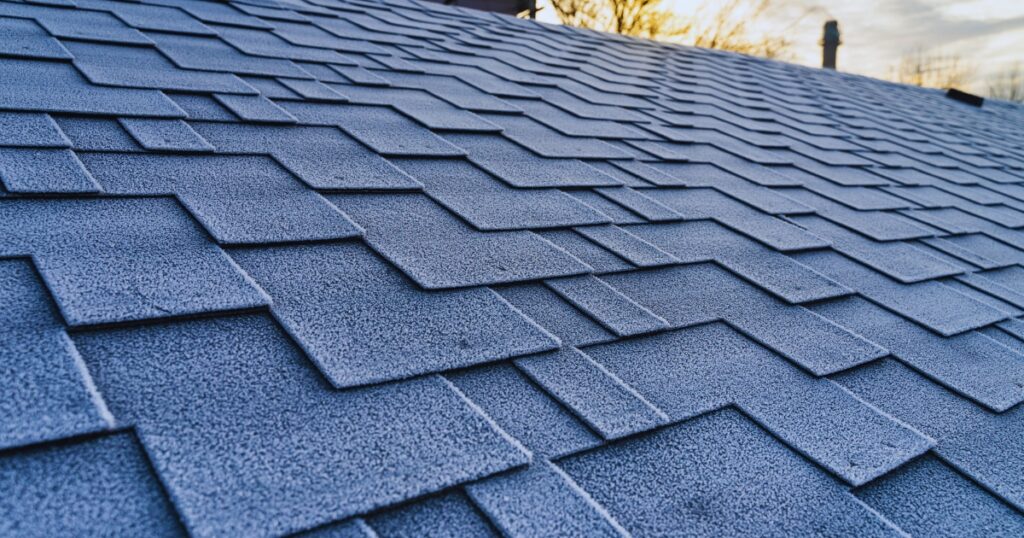
Overlapping Techniques
Along with a proper starting point, mastering overlapping techniques is necessary for an effective shingle installation. Proper overlap ensures that water runs off the roof and doesn’t seep beneath the shingles, which can lead to leaks. Each row of shingles should cover the row below it partially, typically by at least 5 inches, to create a secure barrier against the elements.
It is important to note that the overlap should be consistent across all rows. Staggering the joints between rows not only enhances the structural integrity of your roof but also improves its visual appeal.
When placing your shingles, make sure to lay each shingle so that its edges do not line up with the ones below; this way, you create a more secure seal and provide better protection against wind and rain. Taking the time to precisely overlap and stagger each shingle will ultimately lead to a durable and effective roofing system.
Securing the Shingles
Despite the various weather conditions your roof may face, securing the shingles properly is vital for their longevity. Adequate fixation ensures that your roofing material withstands wind, rain, and other elements. Follow established best practices for nailing, and ensure that every shingle is firmly affixed to avoid premature wear or damage as time goes on.
Proper Nailing Techniques
Between the types of shingles and the specific environment you’re in, nailing techniques can vary. However, you should aim to nail each shingle in the appropriate zone, using the correct number of nails—typically four for standard shingles. Ensure that your nails are straight and flush with the shingle surface to prevent water infiltration.
Avoiding Common Mistakes
Techniques that may seem minor can lead to significant roofing issues if overlooked. Skipping the use of underlayment, nailing too high or low, or using the wrong kind of nails can compromise your roof’s integrity.
Make sure to stagger your seams for a more durable installation. This attention to detail will keep your roof watertight and protect your home for years.
Further, it’s important to consider environmental factors when stacking your shingles. For instance, if you’re working in high temperatures, shingles can become more pliable, making it easier to nail them incorrectly.
Also, be cautious of over-driving nails, as this can lead to damage or gaps in your roof. By focusing on these common pitfalls, you can ensure a secure and reliable shingle installation.
Post-Installation Maintenance
Many homeowners overlook the importance of post-installation maintenance, which can significantly extend the lifespan of your shingles. Regular checks and timely upkeep help to preserve your roof’s integrity and functionality, ensuring it remains a sturdy barrier against harsh weather conditions.
Regular Inspections
Against the wear and tear that your roof experiences, you should conduct regular inspections at least twice a year. Look for signs of damage, such as cracked or missing shingles, and ensure that gutters and downspouts are clear to prevent water buildup.
Cleaning Procedures
Between inspections, it’s important to keep your roof clean to prevent the accumulation of debris that can lead to mold or degradation. Regularly remove leaves, branches, and other contaminants that may cling to your shingles.
Considering the impact of organic matter on your roof’s health, cleaning procedures should include gentle methods to avoid any damage. Use a soft brush or a leaf blower and avoid high-pressure washing, which can strip away protective granules.
If you notice significant growth of algae or moss, consider using a specialized roof cleaner to treat these spots effectively but gently.
People Also Read:
Summing up
On the whole, stacking shingles on your roof requires careful attention to detail and safety. Begin by ensuring a level surface to prevent sliding and damage. Organize the shingles in manageable bundles, and overlap them appropriately to maintain water resistance.
Secure each stack in place, using roofing nails or clips as necessary to avoid wind displacement. By following these steps, you can achieve a sturdy, well-organized roofing system that enhances the durability and appearance of your home.